Unlock the Secret to Crispy Restaurant-Style Fried Ravioli at Home
Imagine biting into a golden-brown, perfectly crispy exterior, followed by the delightful burst of tender pasta and rich, melted cheese. That’s the magic of fried ravioli – an appetizer that consistently steals the show, transforming any meal into a special occasion. While often enjoyed in Italian restaurants, this indulgent treat is surprisingly simple to recreate in your own kitchen. Forget soggy, bland imitations; with our comprehensive guide, you’ll master the art of making irresistibly crunchy, cheesy, restaurant-quality fried ravioli that will have everyone asking for your secret recipe.
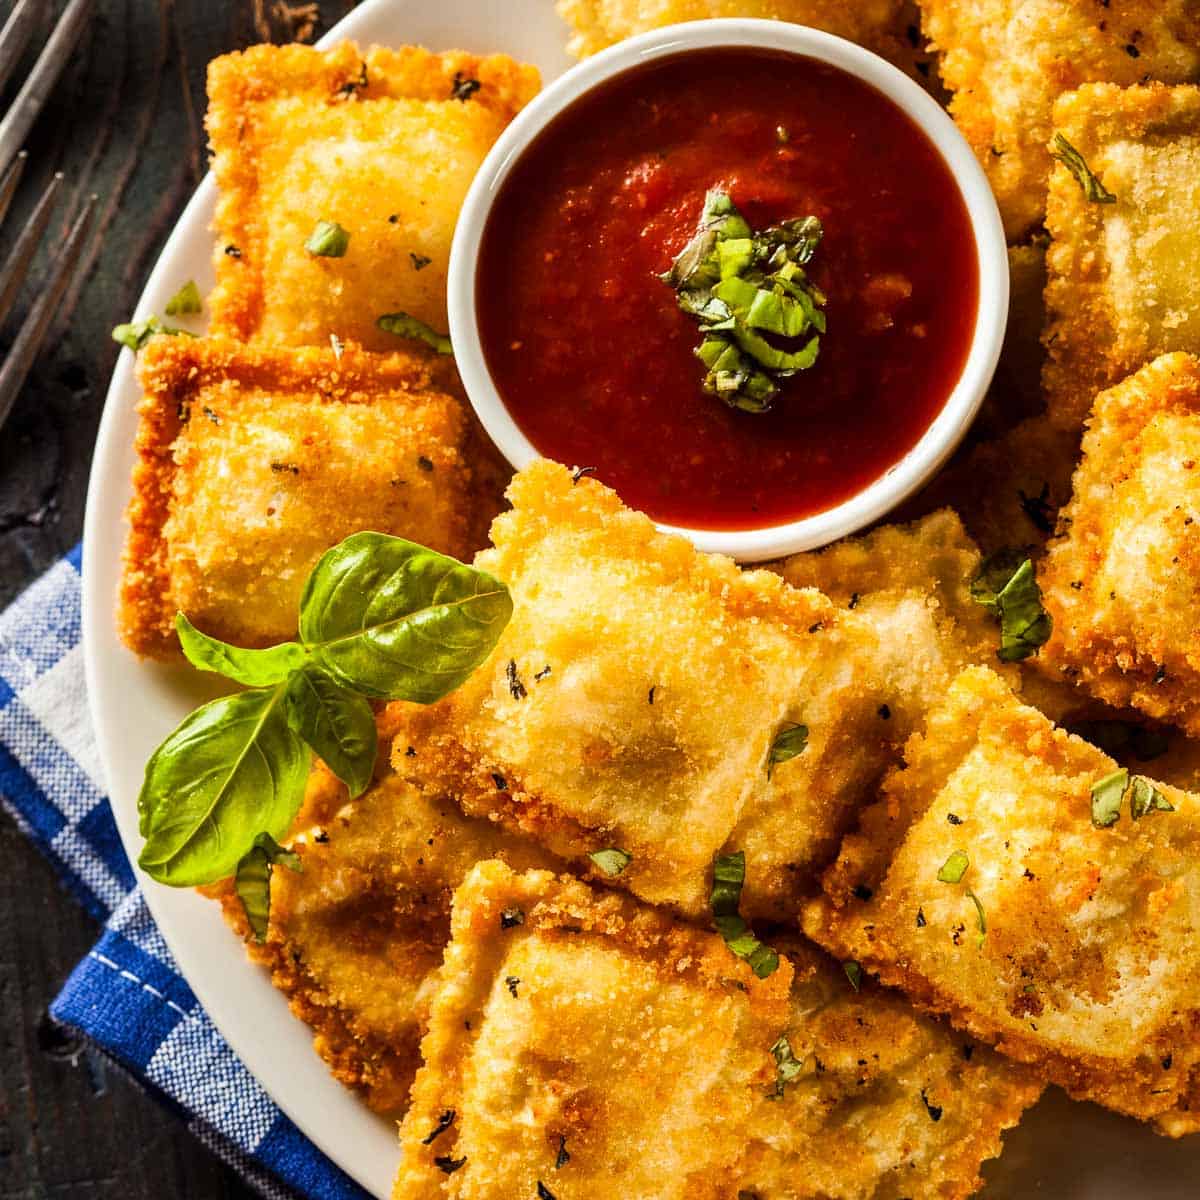
These little pasta pockets are a textural marvel: a crunchy shell giving way to a soft, savory filling. Served with a vibrant marinara sauce and a sprinkle of fresh Parmesan and parsley, they hit all the right notes, making them the ultimate crowd-pleasing appetizer. Be warned, though – they disappear incredibly fast!
Why Homemade Fried Ravioli is Your Next Go-To Appetizer
While the allure of dining out is undeniable, bringing the restaurant experience home offers unique advantages. Here’s why mastering fried ravioli is a culinary endeavor you won’t regret:
- Party-Perfect Elegance: Looking for an impressive appetizer that requires minimal fuss? Fried ravioli are your answer. They look sophisticated, taste gourmet, and can even be partially prepared in advance, allowing you to fry them just before guests arrive for maximum freshness. For more party ideas, check out The Ultimate Crispy Fried Ravioli: Your Go-To Party Appetizer.
- Irresistible Texture Contrast: The magic lies in the juxtaposition. A truly great fried ravioli boasts an audible crunch from its golden-brown exterior, beautifully contrasting with the soft, pillowy pasta and warm, gooey cheese inside. This interplay of textures is what makes each bite so incredibly satisfying.
- Authentic Restaurant-Style Indulgence: There’s a particular indulgence associated with restaurant appetizers. This recipe allows you to replicate that same high-quality taste and experience right in your home kitchen, often at a fraction of the cost. You control the quality of ingredients, ensuring a fresher, more delicious outcome.
- Endless Customization: While marinara is the classic companion, fried ravioli are wonderfully versatile. Experiment with different dipping sauces like a zesty garlic aioli, a spicy ranch, or even a pesto drizzle. You can also vary the type of ravioli, using meat-filled, spinach, or mushroom varieties to suit your preference.
- Surprisingly Easy & Quick: Despite their gourmet appeal, these crispy bites are incredibly simple to make. With a bit of prep, you can have a batch ready to serve in under 30 minutes, making them ideal for spontaneous gatherings or weeknight treats.
The Secret to Crispy Perfection: Ingredients That Matter
Crafting the perfect fried ravioli starts with understanding the role of each ingredient. Quality and freshness are key to achieving that coveted restaurant-style crispness and flavor.
- Cheese Ravioli: The Star of the Show
Choose high-quality store-bought cheese ravioli, either fresh or frozen. Fresh ravioli often yields a slightly more tender interior, but frozen works perfectly well, just ensure they are thawed and patted dry before coating to prevent excess moisture. A classic ricotta-filled ravioli is excellent, but feel free to experiment with four-cheese blends for added complexity. - Buttermilk: The Adhesion Dynamo
Buttermilk is crucial for two reasons: its acidity subtly tenderizes the pasta, and its thickness creates the perfect tacky surface for the breading to adhere. This ensures your coating stays put and gets wonderfully crispy. No buttermilk? Simply mix 1 tablespoon of white vinegar or lemon juice with regular milk and let it sit for 5 minutes before using. - All-Purpose Flour: The Foundation Layer
A light dusting of all-purpose flour is the first step in our breading process. It helps absorb any surface moisture from the ravioli and provides an even better grip for the buttermilk, setting the stage for a robust, crispy crust. - Italian-Style Bread Crumbs: The Flavor & Crunch Giver
These seasoned bread crumbs are the primary source of that beautiful golden-brown color and irresistible crunch. They're often seasoned with herbs like oregano, basil, and garlic powder, adding a layer of savory flavor. For an even crunchier texture, consider using Panko breadcrumbs, either alone or mixed with Italian breadcrumbs. You can also add extra seasonings like onion powder, paprika, or a pinch of red pepper flakes for a kick. - Parmesan Cheese & Fresh Parsley: The Finishing Touch
A generous sprinkle of freshly grated Parmesan cheese adds a sharp, salty, umami finish that perfectly complements the rich cheese filling within. Chopped fresh parsley provides a vibrant pop of color and a mild, herbaceous freshness, elevating the dish visually and aromatically. - Vegetable or Olive Oil: The Frying Medium
Choosing the right oil is vital for even cooking and a consistent crispy texture. Vegetable oil, canola oil, or light olive oil are excellent choices due to their high smoke points and neutral flavor. You'll need enough to submerge the ravioli (about 2 inches in depth), ensuring they cook evenly to a beautiful golden brown. - Marinara Sauce: The Essential Dipper
A warm, robust marinara sauce is the classic pairing for fried ravioli. Its bright, tangy tomato notes cut through the richness of the fried cheese, creating a perfectly balanced bite. You can use your favorite store-bought brand or whip up a quick homemade version.
Mastering the Art of Frying Ravioli: A Step-by-Step Guide
Making these crispy delights is straightforward, but a few key techniques will ensure restaurant-worthy results every time. Follow these steps for perfect fried ravioli:
1. Prepare Your Frying Setup
- Heat the Oil: Pour your chosen frying oil (vegetable, canola, or light olive oil) into a deep pot, Dutch oven, or large, heavy-bottomed skillet. Aim for about 2 inches of oil depth.
- Monitor Temperature: Place the pot over medium heat and allow the oil to heat gradually to 350°F (175°C). This temperature is crucial for achieving a crispy exterior without burning or making the ravioli greasy. Use a reliable kitchen thermometer (clip-on deep-fry thermometer or instant-read) to monitor the temperature continuously. Too cool, and the ravioli will absorb too much oil; too hot, and the exterior will burn before the inside warms through.
2. Set Up Your Breading Station
Efficiency is key here. Arrange three shallow bowls in an assembly line:
- Bowl 1: All-purpose flour.
- Bowl 2: Buttermilk.
- Bowl 3: Italian-style bread crumbs (you can mix in additional Parmesan or seasonings here for extra flavor).
3. Coat the Ravioli for Maximum Crispness
Work with one ravioli at a time to ensure even coating:
- Flour First: Dip each ravioli into the flour, lightly coating all sides. Gently shake off any excess flour. This layer helps the buttermilk adhere better.
- Buttermilk Bath: Submerge the floured ravioli into the buttermilk, ensuring it's fully coated. Let any excess drip off.
- Breadcrumb Dredge: Finally, dredge the buttermilk-coated ravioli generously in the bread crumbs. Press gently to ensure the crumbs adhere well to every surface. A firm, even coating is essential for that ultimate crunch.
- Repeat: Place the coated ravioli on a plate or baking sheet. Repeat the process for all remaining ravioli.
4. Fry to Golden Perfection
This is where the magic happens! Proper frying technique is vital for that signature crispness:
- Batch Frying: Working in small batches (typically 4-6 ravioli at a time, depending on your pot size), carefully lower the coated ravioli into the hot oil using tongs or a slotted spoon. Do not overcrowd the pot, as this will drop the oil temperature and lead to soggy ravioli.
- Cook Evenly: Fry for 2-3 minutes per side, or until they turn a beautiful golden brown and appear crispy. Use tongs or a slotted spoon to gently turn them to ensure even cooking.
- Drain Excess Oil: Once golden and crispy, remove the fried ravioli from the oil using a slotted spoon and transfer them to a plate lined with paper towels to drain any excess oil. A wire rack placed over paper towels also works wonderfully for ensuring airflow and maintaining crispness.
- Maintain Temperature: Allow the oil temperature to recover to 350°F (175°C) between batches before adding more ravioli.
5. Garnish and Serve Immediately
The final touches elevate your homemade fried ravioli to restaurant-quality status:
- Garnish: Immediately after draining, transfer the hot fried ravioli to a serving platter. Sprinkle generously with freshly grated Parmesan cheese and chopped fresh parsley. The residual heat will help the cheese melt slightly and the parsley adhere.
- Serve Warm: Serve your crispy creations warm with a side of your favorite marinara sauce for dipping.
Expert Tips for the Best Fried Ravioli
- Temperature Control is King: As mentioned, maintaining the oil temperature at 350°F (175°C) is paramount. Fluctuations lead to either greasy or burnt ravioli.
- Don't Overcrowd: This cannot be stressed enough. Frying in small batches is the secret to even cooking and maximum crispness. Patience here pays off!
- Pat Dry Your Ravioli: If using fresh ravioli, gently pat them dry with paper towels before coating. Excess moisture can cause the breading to separate or create steam, leading to less crisp results.
- Consider Double Breading: For an extra thick and crunchy crust, after the first breadcrumb coating, dip the ravioli back into the buttermilk and then again into the breadcrumbs. This creates an incredibly robust crust.
- Make Ahead Option: You can bread the ravioli several hours in advance and store them uncovered in the refrigerator. This allows the breading to dry out slightly, which can lead to an even crispier fry. Bring them to room temperature for about 15-20 minutes before frying.
- Reheating Leftovers: While best enjoyed fresh, leftovers can be crisped up in an air fryer at 350°F (175°C) for 5-7 minutes or in a conventional oven at 375°F (190°C) for 8-10 minutes.
- Air Fryer Alternative: For a lighter take without sacrificing too much crunch, consider air frying! Lightly spray the breaded ravioli with cooking oil and air fry at 375°F (190°C) for 8-12 minutes, flipping halfway, until golden and crispy. Learn more about this option in Easy Fried Ravioli in 25 Minutes: Pan-Fry or Air Fry Options.
Beyond Marinara: Variations & Serving Suggestions
While classic marinara is a winner, don't hesitate to get creative:
- Dipping Sauces: Try a creamy garlic aioli, a zesty lemon-herb dip, a spicy sriracha mayo, a sweet and tangy honey mustard, or even a rich pesto.
- Ravioli Fillings: Experiment with different ravioli varieties like spinach and ricotta, mushroom, or even meat-filled for a heartier appetizer.
- Spicy Kick: Add a pinch of cayenne pepper or red pepper flakes to your breadcrumb mixture for a subtle heat.
- Cheese Blend: Mix some finely grated Pecorino Romano into your Parmesan for a sharper, saltier kick.
With these tips and techniques, you’re now equipped to create truly exceptional, restaurant-style fried ravioli right in your own kitchen. Whether it's for a special gathering, a game night, or just a treat for yourself, these crispy, cheesy bites are guaranteed to impress and satisfy. So roll up your sleeves, gather your ingredients, and prepare for a delicious adventure!
